

How To Deep Clean Bottom Of Blender
Blender is a complimentary 3D modeling software, but there are many features that make modeling with Blender feel like a professional, industry-standard feel. Blender modeling is fabricated much easier through things like Proportional Editing, the subject of this article.
What Is Proportional Editing in Blender?
Proportional Editing, also known equally Proportional Edit earlier Blender three.0, is one of the most normally-used mesh-editing accommodations in the app. You can apply it to create natural, organic-feeling 3D models effortlessly.
It's an averaging feature that allows you to sculpt your meshes intuitively. It does so past simulating the experience of working with a deformable material that is cohered from inside to some extent—Proportional Editing mimics the forces at play inside of something like a ball of elastic dough.
If you want to pattern something organic, similar a homo face up, you would need some way of averaging each stark mathematical transformation that y'all use. Without Proportional Editing, y'all would need to taper each loop of edges backside each movement manually, one by ane, before the primitive would start to resemble the thing that you're trying to model.
To put it bluntly: ain't nobody got time for that. Proportional Editing makes creating 3D objects a delight, all without micromanaging every indicate making up your mesh. This tool makes designing smoothen, natural-feeling objects incredibly easy.
How to Use Proportional Editing in Blender
To plough on Proportional Editing in Blender, you'll need to exist in either Object Mode or Edit Mode. We'll be working in Edit Fashion in order to demonstrate the Proportional Editing effect generically.
Activating Proportional Editing in Blender is as simple as hitting the little radio button at the terminate of the toolbar underneath your workspace options. Information technology'south right next to a dropdown labeled with what looks like a parabola being pulled up from a horizontal line. You can also actuate Proportional Edit mode past pressing O.
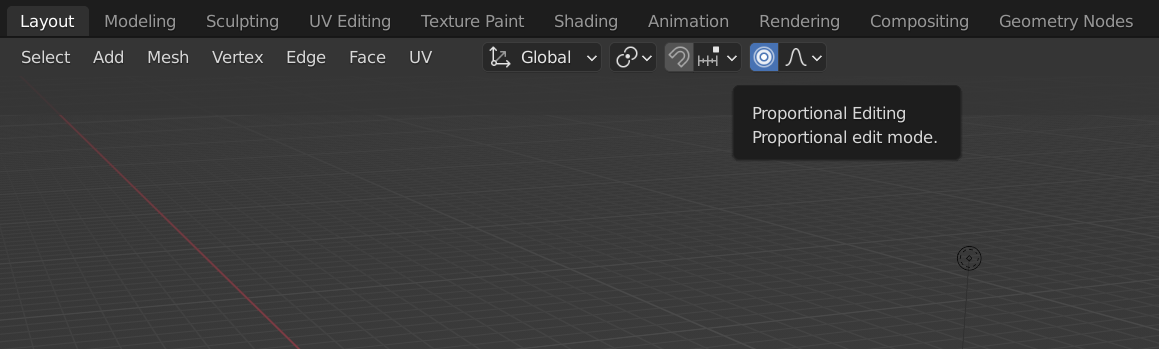
This dropdown contains all of the dissimilar smoothing and averaging algorithms that y'all take to choose from when using Proportional Editing. We're going to break these down in a moment—for now, permit's focus on how Proportional Editing works in a full general sense.
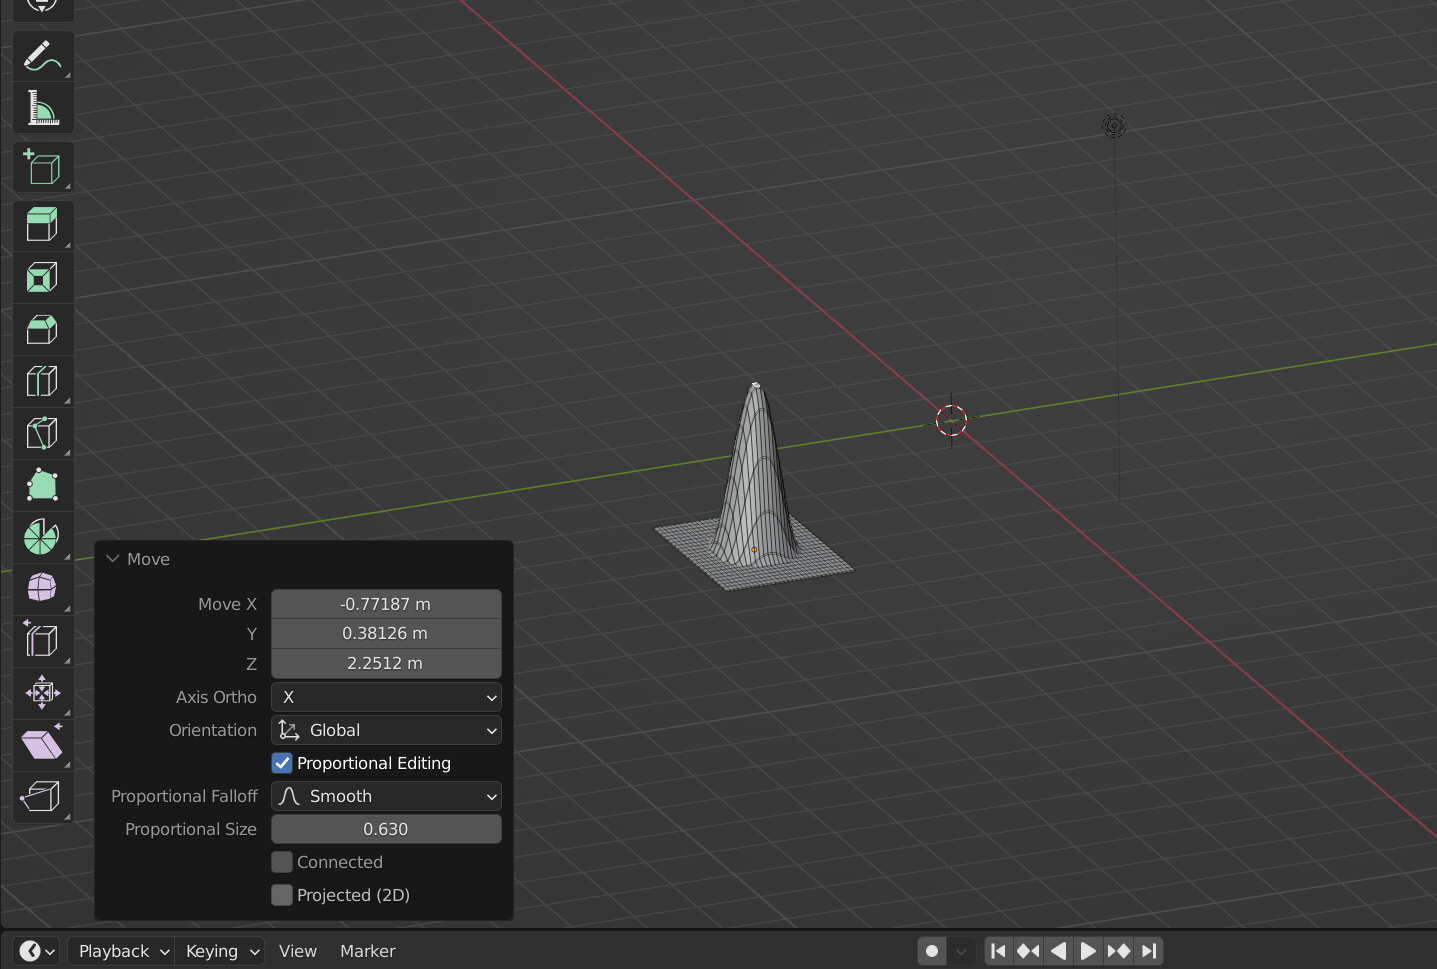
To begin, create a mesh and select one of its faces in Edit Manner. Use G to grab it, followed past 10, Y, or Z to move it out from the rest of the object, stretching information technology out.
After doing this, drop that mouse and don't click a matter. Earlier clicking abroad from this simple translation, yous'll need to expand the minimized Move bill of fare at the bottom-left corner of your staging area.
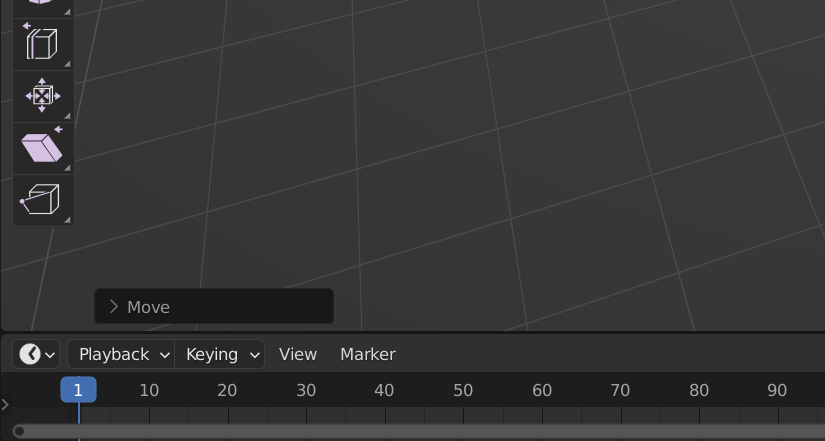
Here, you lot'll observe all of your additional Proportional Editing settings and options. Let's cheque them all out.
How Does Proportional Editing in Blender Piece of work?
3D models are a petty dissimilar from existent-life objects made of, say, clay. When you catch an edge in Blender'due south Edit Mode, it doesn't automatically elevate the residuum of the mesh along with it.
Instead, the edges and faces in between your handle and the object that remains stretch or contract in order to compensate for the motility. When adjusting a mesh in Blender, the points are the only "solid" things to take hold of onto. The balance of the object is merely the pare stretched across them.

Move Ten, Y, and Z are merely sliders that you can utilize to conform the translation of your selected face; increasing any variable here volition simply lift the tapering cease of the pear away farther or push button it closer. Axis Ortho and Orientation are also slightly irrelevant to us at this time. Ignore these for at present. You'll run into Proportional Editing simply underneath next to a fiddling checkbox.
You tin actually enable this tool whenever you practice anything in Edit Mode—scaling, shearing, you lot name it. Even if you've already made an aligning, you can plow on Proportional Editing using this checkbox equally long as y'all immediately click into the menu that we're using currently.

Proportional Size controls the "radius" of your Proportional Edit falloff. The higher you set it, the more of the mesh volition follow the part that you've selected and changed. In the example of a simple move, a Proportional Size greater than the width or diameter of the object applies the translation to the unabridged mesh, as though you had every bespeak selected when you lot made your move.
Connected allows you to piece of work by continued geometry instead of with a strictly volumetric radius. The official handbook suggests toggling this option on when adjusting things like the fingers on a hand; you lot can pose them all freely and independently, without worrying nigh tugging on the rest unnecessarily.
Projected (2D) totally ignores the reality of the mesh itself. Instead, each transform will be governed past what you really see in the viewport—if there were ever a time for switching to one of your perpendicular orthographic viewport presets, that time would be at present.
Instead of pulling a 3D lump out of a flat surface, you can hitting one of your number pad hotkeys, straightening out the viewport, and create a perfectly even rolling wave along its entire projected length.
Different Types of Proportional Editing
When using Proportional Editing, at that place are two types of points to have into consideration: the points that you have selected, and the residue of the points in the mesh. What happens between these 2 parties of geometry will largely be adamant by your Proportional Falloff selection.
You can toggle through all of your falloff options using Shift + O; Smoothen is the default pick that volition be enabled.
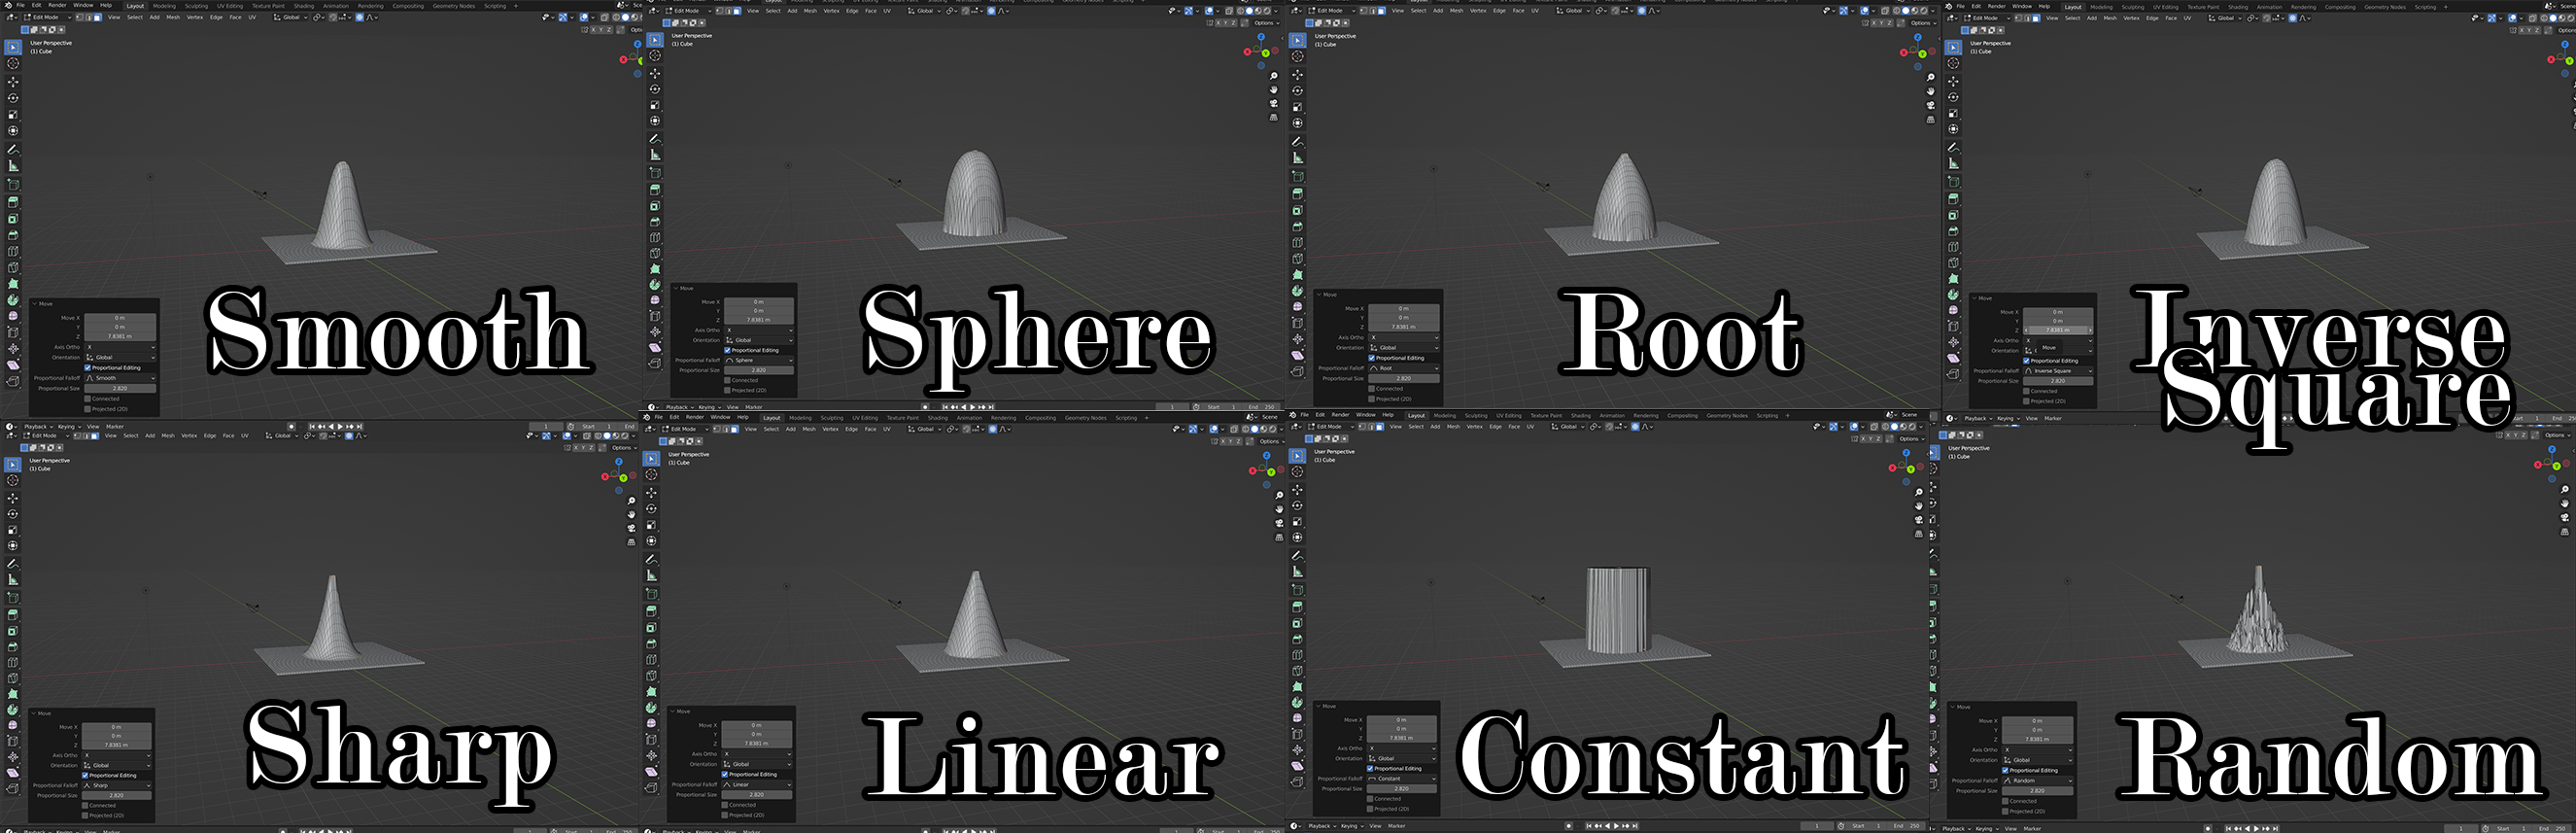
Random Proportional Editing is awesome for stuff like making rocks or annihilation jagged, uneven, or bumpy. The most confusing out of all of these will likely be your Constant Proportional Edit setting. What's the difference betwixt using this and simply lifting the faces without Proportional Editing at all?
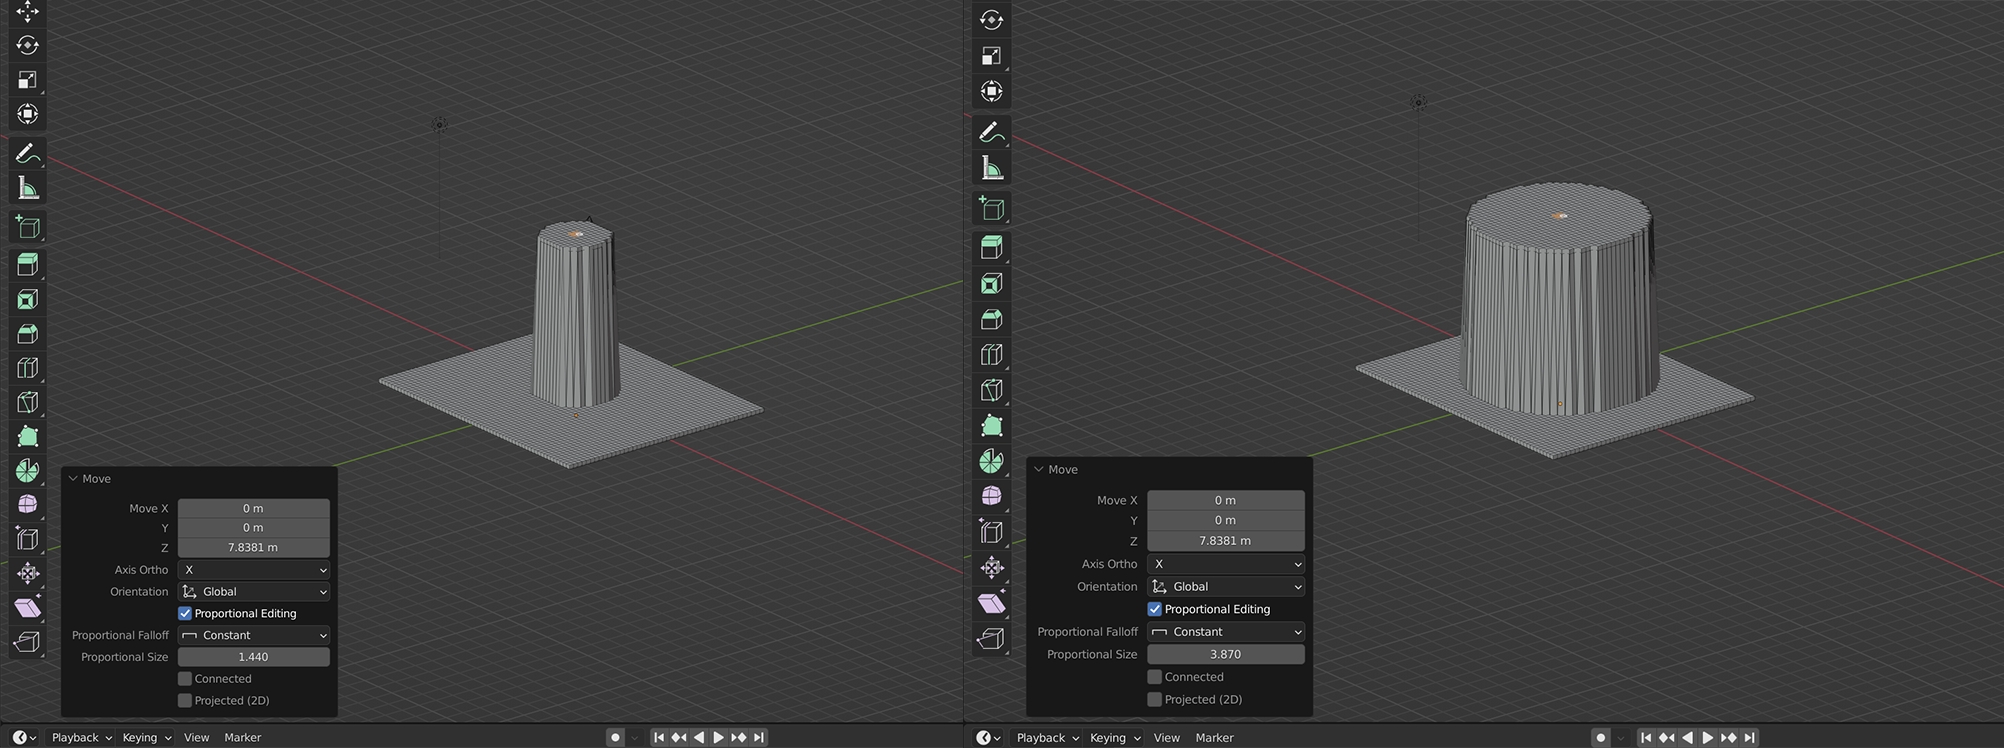
Here, you'll see that the Proportional Size applies only to the footprint of what you catch, leaving you lot with a uniformly steep cliff across the faces that you've grabbed. A subtle stardom, but one that'due south skillful to know in whatever instance.
Proportional Editing in Blender
3D modeling with Blender takes no time at all to selection upward. No matter which tools y'all prefer when you're in there getting your hands dirty, few will contest the fact that Proportional Editing is i of the most useful Blender basics to main early on on.
Once you've had a take chances to attempt out every flavor for yourself, you'll likely be able to come up with a myriad of applications for all of these different ways to utilise Proportional Editing.
About The Writer 

Source: https://www.makeuseof.com/blender-proportional-editing-how-to/
Posted by: curtisaften1971.blogspot.com
0 Response to "How To Deep Clean Bottom Of Blender"
Post a Comment